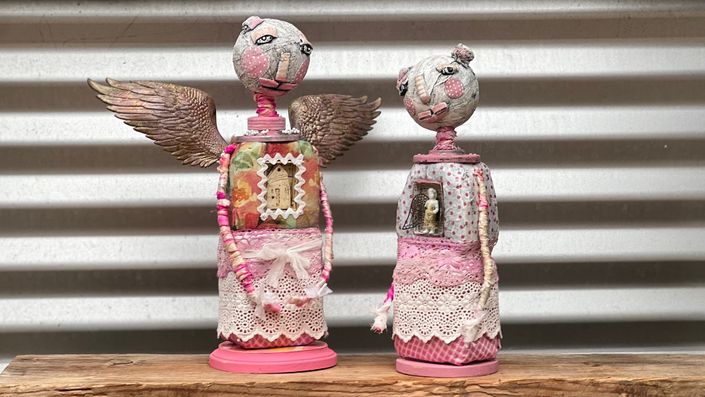
Mixed Media Dolls with Kecia Deveney
Learn how to make a mixed media doll with expression and personality
Enroll in Course
Have you ever seen a unique and artistic doll displayed somewhere and thought how can I make that? Do you have a collection of art supplies and wondered how to use them in a creative way while making a one-of-a-kind mixed media doll? If you answered yes, we now have the course for you. Kecia Deveney is bringing her latest course “Mixed Media Doll” exclusively to Create Arts Online and we are thrilled to share it with you.
Kecia is a creative genius with so many tricks and tips to share, and we have them all here for you in this course. One of Kecia’s super powers is her engineering skills when building her dolls. Kecia loves to experiment with different materials and she is always finding new ways to add an extra special touch to her creations.
In this course you will learn:
- How to create the head and body with simple materials
- How to cut and form the body parts
- How to cover the head with texture and add a vintage effect
- How to create the facial features that add personality and expression
- How to create a niche for a personal touch
- How to add collage and fabrics to the doll for a more unique look
- Kecia’s “Mixed Media Engineering” tips that bring all the parts together
- Kecia’s simple yet endearing method for building the arms
- A BONUS section for adding whimsical wings to the doll
- How to add final details that make your doll special and unique
This course is for any level of creator. Whether this is your first doll-making experience or you are a seasoned maker, learning and creating with Kecia “by your side” will allow you to make countless dolls with your own creative voice.
Included in this course is Kecia’s list of the suggested materials and resources for download. Kecia believes that you can create dolls with just about any material. There is a good chance that you may already have all you need in your studio or art space, so let’s get creating!
Your Instructor

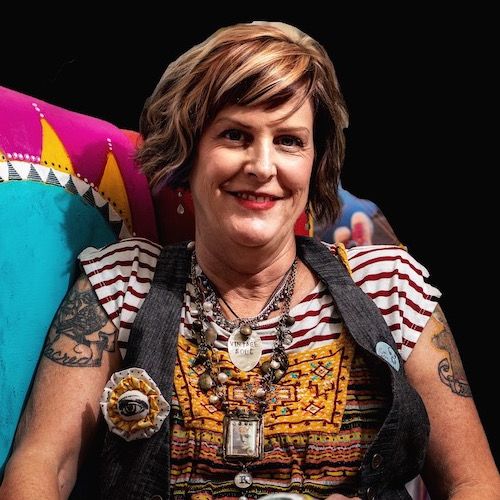
Kecia Deveney is a mixed media artist based in the Jersey Shore channeling her life experiences into whimsical works that playfully distort our reality. She incorporates fabric, textiles, jewelry design, sculpture, and painting into a colorful eclectic practice that seeks to inspire others to acknowledge their inherent creative spirit. A self-taught artist, she rejects the rules and notions of fine art in a vibrant juxtaposition of figuration and abstraction with an emphasis on textured visceral works.
While art had always fascinated Kecia, she discovered her talents when she relocated from her California home to coastal New Jersey. While building her new life, she took to engaging with craft, design, and the visual arts to transform her living space into a wonderland of her own creation. Spending most of her days as a caregiver, her art became an outlet. Embracing the unusual, she continued to expand her practice. She was met with a positive response as others fell in love with the imaginative worlds she invited them to explore. As her acclaim grew, she became a world traveler, uplifting artists around the globe with her art and drawing from their rich cultures and experiences to inform her work and evolving practice. Today, she is sharing her journey, skills, and motivation with others as an educator. Her work continues to teach us about the value of accepting your individuality and allowing your distinct style of creativity to flourish.
Course Curriculum
-
StartIntro and Personal Interview with Kecia and Tami (4:41)
-
StartPDF for Download. Suggested list of materials resources
-
StartMaterials overview (12:22)
-
StartChoosing your focal point for the niche (0:56)
-
StartFirst steps to consider for the construction of the doll (10:34)
-
StartHow to make the facial features (17:27)
-
StartHow to create the doll body (7:21)
-
StartTaping the foam (4:33)
-
StartCutting out the niche (9:37)
-
StartCollage the niche box (6:14)
-
StartAdding collage to the torso (9:19)
-
StartAdding fabric for the bottom of the doll (13:38)
-
StartAdding the doll's skirt (7:53)
-
StartAuditioning and adding the niche elements (9:02)
-
StartIntroducing the paints and starting the face (6:16)
-
StartAdding the second layer of paint to the face (4:06)
-
StartDry brushing technique on the face (10:38)
-
StartPainting the facial features (5:41)
-
StartHighlights and details on the facial features (3:00)
-
StartHow to make the arms (12:16)
-
StartReady to assemble the doll (14:19)
-
StartExtra tips and tricks while building your doll (4:37)
-
StartAdded details and attaching the arms (13:25)
-
StartAdding the "fussy" bits and base (3:11)
-
StartUse materials you already have....get creative! (1:00)
-
StartAdding a crown works too..... (0:29)
-
StartBONUS: Adding wings to your doll (1:23)
-
StartBONUS: Paint your wings gold (1:37)
-
StartBONUS: Alter the wings with more paint and other details (8:00)
-
StartBONUS: Attaching the wings (5:29)
-
StartWrap up and Thank you! (1:26)