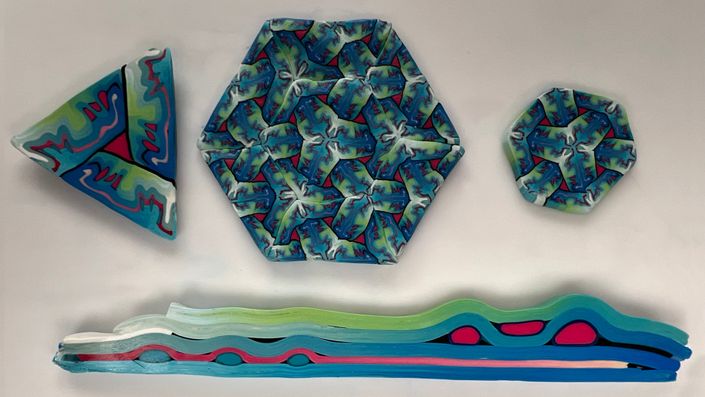
Beginner Polymer Clay Kaleidoscope Caning with Sarah Shriver
Learn basic tips and techniques to create polymer clay patterns and canes
Enroll in Course
Welcome to the wonderful world of polymer clay! Are you ready to unlock endless possibilities and create stunning graphics that resemble one-of-a-kind kaleidoscope patterns? Look no further, because Create Arts Online is thrilled to have Sarah Shriver as your guide on this exciting journey.
With over thirty years of experience in crafting her own unique version of kaleidoscope canes, Sarah is here to ensure that anyone can master this process. By the end of the course, you'll be able to craft unique earrings, pendants, and more.
Sarah will take you step by step through her tried and true methods, making sure you have a solid foundation in working with polymer clay.
In this course Sarah teaches:
- How to choose the best polymer clay
- How to create a harmonious color palette
- How to condition the clay
- How to craft blocks of clay
- How to create a Skinner Blend
- How to add inclusions to the blends
- How to create a slab that will be the foundation for your graphic
- How to skillfully reduce the slab to canes
- How to create a cane and cut it
- How to transform the canes from basic to complex kaleidoscope patterns
- How to shape the patterns into shapes for various jewelry items
- How to bake the clay
- How to drill holes to add jewelry findings and wire work
Throughout the course, Sarah will be right there with you, virtually holding your hand and demonstrating every step of the process. Her techniques have been broken down into simple and achievable steps, empowering you to create as many polymer clay kaleidoscope canes as your heart desires. By the end, you'll feel confident in your ability to bring your imagination to life with vibrant shapes and colors.
Included in this course is a PDF for download of Sarah's suggested tools, materials, and resources.
Your Instructor

I have been working in polymer clay from my backyard studio here in California for over 25 years. When I discovered the medium I was working in a wonderful art supply and fabric store in San Francisco where I was mainly focused on textiles. The first time I gave polymer clay a try, I connected with it right away. Being familiar with Italian mille fiori glass techniques, I realized a way that I could mimic the patterns that I loved in older rugs and textiles by creating simple graphic "canes" and mirroring them together in endless variations. I soon found myself building large libraries of patterned canes that were great for making jewelry.
My methods for constructing mille fiori canes and building intricate patterns have been taught to students all over the world. I have been featured in many books on polymer beginning with the seminal book "The New Clay" by Nan Roche, and including "Masters, Polymer Clay: Major Works by Leading Artists", Published by Ray Hemachandra of Lark Crafts.
I still love teaching these techniques and hope I can infect you with my enthusiasm for making intricate canes in polymer clay."
Course Curriculum
-
StartIntro and personal interview with Sarah and Tami (6:13)
-
StartPDF for download. Suggested tools, materials, and resources
-
StartCourse overview (1:08)
-
StartTools and materials overview (3:57)
-
StartProcessing and conditioning the clay with a food processor (optional) (5:00)
-
StartHow to build sheets of clay with the pasta machine (4:36)
-
StartRolling out the clay into slabs with the pasta machine (2:04)
-
StartHow to build color blocks for making blends (10:31)
-
StartRolling the clay to create the Skinner Blend (10:07)
-
StartHow to create inclusions in the blends (7:08)
-
StartHow to get the stack ready to build a slab (12:17)
-
StartSarah's technique for reducing the slab (10:09)
-
StartHow to build a trapezoid with the reduced graphic (6:32)
-
StartHow to create a graphic triangle with the three trapezoids (9:55)
-
StartHow to reduce the trapezoid and cut the cane to build a kaleidoscope graphic (7:47)
-
StartBuilding the first four part kaleidoscope (6:43)
-
StartHow to create a square shape from the cane (4:26)
-
StartSimple graphic cane with same color schematic (4:40)
-
StartHow to create a bold graphic with an oval cane shape (3:34)
-
StartAltering the graphic and adding a bit of pop with black (11:21)
-
StartHow to create a simple stripe pattern cane (3:50)
-
StartOverview of the canes using the same slab (1:10)
-
StartHow to create a ball shape bead (8:25)
-
StartHow to create a round flat pendant (8:28)
-
StartHow to make a double point oval bead (6:51)
-
StartHow to add a dark crisp outline to a shaped bead (6:20)
-
StartExperiment with different shapes and outlines (4:03)
-
StartSarah's technique for making a pillow bead (5:25)
-
StartIntroduction to the Polymer Clay Oven (2:05)
-
StartSetting the holes pre-baking (2:28)
-
StartLoading the oven with the clay creations (1:37)
-
StartHow to drill holes into the beads after baking to create jewelry (13:23)
-
StartHow Sarah sands and buffs her pieces (7:30)
-
StartSarah's tips and tricks for creating her jewelry findings and wire work (18:06)
-
StartExtra tip: How Sarah stores her extra canes for years to come (1:12)
-
StartCourse conclusion and thank you! (0:22)
-
StartSarah's Beginner Polymer Clay Kaleidoscope Caning Tips and Technical Guide
-
StartSarah's Beginner Polymer Clay Kaleidoscope Caning Story Board and Blends