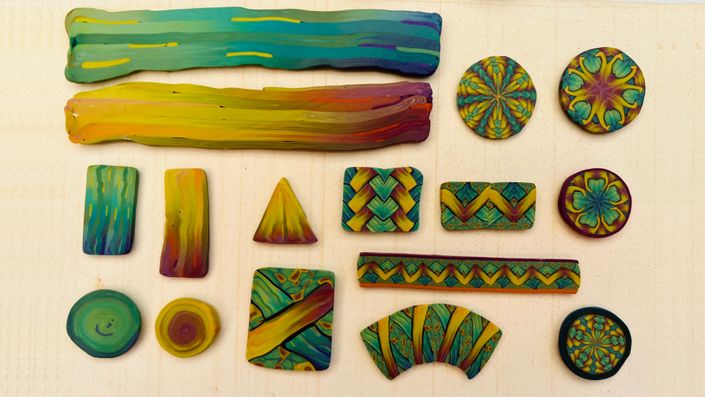
Polymer Clay Kaleidoscope Caning with Sarah Shriver
Learn Sarah's intermediate techniques on how to make polymer clay patterns and canes
Enroll in Course
Imagine the world of endless patterns, patterns, and more patterns, all born from the magic of polymer clay. Are you looking to learn how to create intricate kaleidoscope patterns from blocks of polymer clay and transform them into stunning jewelry, artwork inclusions, and decorative objects? If so, then this course was tailor-made for you.
Your guide is none other than the world-renowned polymer clay artist, Sarah Shriver. For over three decades Sarah has masterfully crafted polymer clay kaleidoscope canes into jewelry and other fine art objects, making her the ultimate source of knowledge and inspiration for this art form and now she has brought this online course exclusively to Create Arts Online.
If you are new to the world of Polymer Clay Kaleidoscope Caning, we highly recommend starting with Sarah's Beginner Polymer Clay Kaleidoscope Caning course to build a strong foundation. Once you've honed your skills, you'll be ready to take your skills to the next level with this course. Click HERE and you can even bundle both courses and enjoy a 15% discount automatically.
Sarah's relaxed yet informative teaching style will guide you step by step, through this more advanced course from the moment you open your packages of clay to the final finishing touches on unique earrings and pendants.
In this course you will learn:
- Sarah's preferred clay types and brands
- How to draw inspiration from nature, art, and various exciting objects
- How to curate your own vibrant color palette
- Techniques for conditioning older clay
- How to use the pasta machine to blend the clay seamlessly
- How to create a Skinner Blend
- The secrets of developing canes and skillfully reducing them
- Crafting multiple patterns and kaleidoscope canes
- Creating intricate and complex patterns
- How to cure the clay in a polymer clay oven
- The art of making molds and shapes for stunning jewelry
- Adding jewelry findings and applying the perfect finishing touches
Learning how to create Polymer Clay Kaleidoscope Caning can take your artwork to a whole new level. Whether you are looking to create jewelry, millefiori for your mosaic or fine artwork, or create decorative objects for gifts or your own collection, with Sarah's skills and knowledge you will have a successful outcome each time.
This course includes a PDF for download of Sarah's suggested materials, tools, and resources.

Alina W.
Your Instructor

I have been working in polymer clay from my backyard studio here in California for over 25 years. When I discovered the medium I was working in a wonderful art supply and fabric store in San Francisco where I was mainly focused on textiles. The first time I gave polymer clay a try, I connected with it right away. Being familiar with Italian mille fiori glass techniques, I realized a way that I could mimic the patterns that I loved in older rugs and textiles by creating simple graphic "canes" and mirroring them together in endless variations. I soon found myself building large libraries of patterned canes that were great for making jewelry.
My methods for constructing mille fiori canes and building intricate patterns have been taught to students all over the world. I have been featured in many books on polymer beginning with the seminal book "The New Clay" by Nan Roche, and including "Masters, Polymer Clay: Major Works by Leading Artists", Published by Ray Hemachandra of Lark Crafts.
I still love teaching these techniques and hope I can infect you with my enthusiasm for making intricate canes in polymer clay."
Course Curriculum
-
StartPDF for download. Suggested materials, tools, and resources.
-
StartIntro and personal interview with Sarah and Tami (5:42)
-
StartCourse overview (1:07)
-
StartMaterials tour (7:14)
-
StartDeveloping a color palette (3:03)
-
StartUsing colored pencils to build up a color palette (3:32)
-
StartHow to condition the clay (optional step) (5:50)
-
StartBuilding the first sheets of clay (3:24)
-
StartMixing the first blend (7:05)
-
StartCreating the first ombre blend (1:21)
-
StartSarah introduces the Skinner Blend (9:03)
-
StartAltering the Skinner blends (5:05)
-
StartAltering and stacking the blends (6:35)
-
StartOverview of first ombre blend. Introduction to second color blend (2:06)
-
StartBuilding the second blend (3:47)
-
StartThree colors created to make the second base blend (8:10)
-
StartAltering the second blends with variations of color (5:58)
-
StartSarah demonstrates a simple option for blending (2:04)
-
StartCreating stacks of Skinner blends (8:31)
-
StartAdding inclusions into the blends (6:25)
-
StartReducing a stack into a cane (8:43)
-
StartCutting the cane and creating the first pattern (18:02)
-
StartCreating the first circular shape cane (8:06)
-
StartBuilding a pattern that is a simple field of color (13:37)
-
StartUsing repeating elements to create two different patterns (19:03)
-
StartBuilding a complex cane with distinct patterns (9:07)
-
StartCreating blends for the background of the complex cane (5:07)
-
StartTips and tricks for creating the corners of the complex cane (11:25)
-
StartCreating a linear pattern (7:33)
-
StartChoosing and reducing cane patterns for jewelry pieces (10:07)
-
StartCreating molds for jewelry shapes (12:05)
-
StartHand sculpting and refining ultra light shapes (1:41)
-
StartIntroduction to Polymer Clay oven (1:33)
-
StartCovering ultra light shapes with cane veneers (12:45)
-
StartPart 1: Building a larger complex two part pendant or earring (11:15)
-
StartPart 2: Building a larger complex two part pendant or earring (9:17)
-
StartBuilding the top of the pendant or earring (10:06)
-
StartSanding and polishing the cured jewelry pieces (14:47)
-
StartAdding final details (6:22)
-
StartSarah demonstrates how to add jewelry findings to a pendant and earrings (15:52)
-
StartWrap up and Thank you! (0:31)